Cart 0

Sorry, looks like we don't have enough of this product.

Your order qualifies for free standard shipping. You are $60.01 away from free standard shipping to the 10 provinces.

Roasted in small batches. Dispatch within 1–3 business days.

Subtotal Free
View cart
Final delivery options and applicable taxes are confirmed at checkout

Your Cart is Empty

A better cup starts here.

Start with your grind.

Choose an adjustable burr grinder for repeatable results. We like conical burr grinders for home brewing; espresso needs a grinder with fine, precise adjustment.

A hand burr grinder and ceramic bowl of coffee beans on a sunlit wooden table

Grind size reference

These are good starting points. Your equipment and coffee determine the final setting.

Medium-fine ground coffee for Pour-over

Pour-over

Medium-fine

A sandy texture. Adjust for your dripper, filter and coffee.

Medium ground coffee for Drip coffee

Drip coffee

Medium

A little coarser than pour-over. Keep the texture consistent.

Fine ground coffee for Espresso

Espresso

Fine

Fine, with small adjustments. Use an espresso-capable grinder.

Our ground coffee is prepared for filter/drip. For espresso, choose whole bean and grind to suit your machine.

Find your starting recipe.

Three ways to brew. Same great coffee.

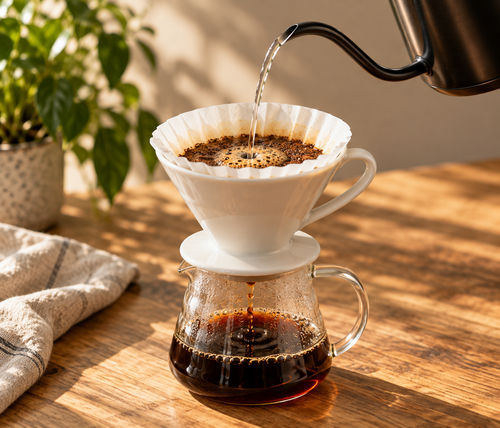
Hot water pouring into a ceramic coffee dripper over a glass server on a sunlit wooden table

Pour-over

Clarity, sweetness, and a little control.

1:16

1 g of coffee for every 16 g of brewing water.

Example: 20 g coffee + 320 g water

Grind size
Medium-fine
Water temperature
94°CA starting point: 92–96°C
Brew time
2:30–3:30Approximate total brew time

Calculate your brew

320 g

Water added to the brewer; finished coffee weighs less because the grounds retain water.

Steps to a great cup

Starting recipe: 20 g coffee + 320 g water

  1. Rinse and preheat

    Rinse the paper filter with hot water and discard the rinse water. Add 20 g of coffee, level the bed, then tare your scale.

  2. Bloom

    Pour 60 g of water to wet all the grounds. Wait 30–45 seconds. This water is included in your 320 g total.

  3. Pour

    Pour gently in stages until the scale reads 320 g total. Keep the stream low and steady, and avoid pouring directly onto the paper.

  4. Finish

    Let the water drain, give the server a gentle swirl and taste as it cools. Use 2:30–3:30 as a starting range, rather than a target at any cost.

Refine your brew

Keep your pouring height and agitation consistent. More agitation can help extraction, but can also move fines into the filter and slow the drawdown. Use taste alongside brew time, changing one variable at a time.

Troubleshooting

Sharp and running fast
Try a slightly finer grind. Keep the dose, water and pouring pattern the same so you can judge the change.
Dry, harsh or very slow
Try a slightly coarser grind or gentler agitation. Check that the filter is seated correctly.
Uneven wetting or flow
Start with a level bed and fully wet the grounds during the bloom. Use a consistent, gentle pour.

These are possible starting adjustments. Change one variable at a time and let taste guide you.

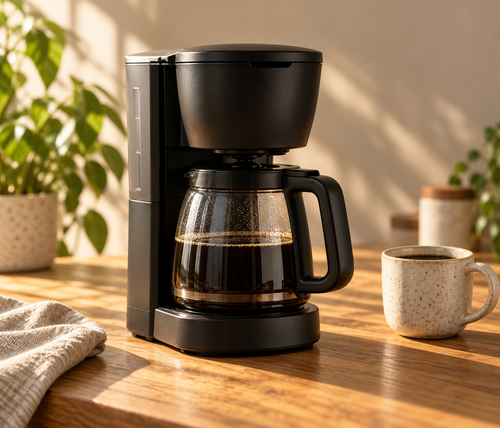
A black automatic drip coffee brewer with a glass carafe and ceramic mug on a warm wooden counter

Drip coffee

A dependable pot, thoughtfully brewed.

1:16

1 g of coffee for every 16 g of brewing water.

Example: 30 g coffee + 480 g water

Grind size
Medium
Water heating
Brewer controlledFollow your machine’s instructions
Brew time
Full brew cycleVaries with the brewer and batch

Calculate your brew

480 g

Water added to the brewer; finished coffee weighs less because the grounds retain water.

Steps to a great cup

Starting recipe: 30 g coffee + 480 g water

  1. Prepare the basket

    Fit the correct paper filter and add 30 g of medium-ground coffee. Gently level the bed so the water can reach it evenly.

  2. Measure the water

    Add 480 g of fresh water to the reservoir. Check your brewer’s minimum batch size; scale up if needed.

  3. Let it brew

    Run the complete brew cycle. Leave the carafe in place until dripping finishes so the whole batch has a consistent strength.

  4. Swirl and serve

    Gently swirl the carafe before serving. Clean the basket and carafe after brewing, and descale according to the manufacturer’s instructions.

Refine your brew

For a larger batch, try 60 g coffee with 960 g water at the same 1:16 ratio. A brewer’s “cup” marking is not a standard mug size: weighing the water is more repeatable. Keep the batch within your machine’s rated capacity.

Troubleshooting

Thin or sharp
First check the dose and water weight. If the ratio is right, try a small grind adjustment finer and taste again.
Harsh or draining slowly
Try a slightly coarser grind. Check the filter fit and keep the basket and showerhead clean.
Inconsistent batches
Use the same batch size and a level coffee bed. Follow the machine’s minimum-fill and maintenance guidance.

These are possible starting adjustments. Change one variable at a time and let taste guide you.

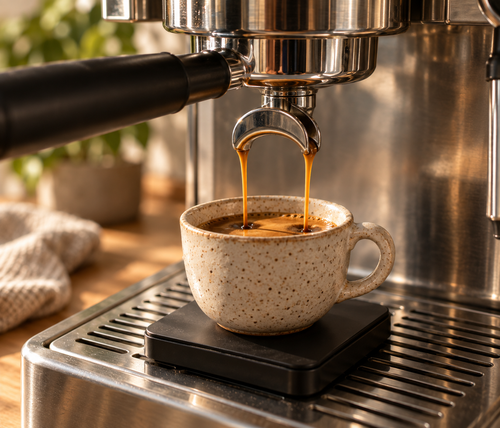
Espresso extracting from a metal group head into a speckled ceramic cup on a scale

Espresso

A small cup, with plenty to explore.

1:2

1 g of dry coffee for every 2 g of finished espresso.

Example: 18 g coffee → 36 g espresso

Grind size
Fine
Water temperature
Machine dependentStart with your machine’s guidance
Brew time
25–35 secondsFrom pump-on; a starting diagnostic

Calculate your brew

36 g

Finished espresso, not water added. Match the dose to your basket.

Steps to a great cup

Starting recipe: 18 g coffee → 36 g espresso

  1. Warm your setup

    Let the machine and portafilter heat fully. Use a basket designed for an 18 g dose, or scale the recipe to suit its rated capacity.

  2. Prepare the puck

    Grind 18 g of coffee finely, distribute it evenly and tamp level. Keep your preparation consistent before changing the grind.

  3. Weigh the shot

    Tare the cup on a scale. Start the pump and timer together, then stop the shot at about 36 g of finished espresso.

  4. Taste and adjust

    Stir and taste. Aim for balance and sweetness. The 25–35 second window is a diagnostic: pre-infusion, machines and coffees can need different times.

Refine your brew

Here, the ratio compares dry coffee with espresso in the cup—not the water sent through the machine. Start at 1:2, hold the dose steady and adjust grind in small steps. Once the flow is even, experiment with yield to explore strength and flavour.

Troubleshooting

Sharp and flowing fast
Try a little finer while keeping the dose and yield steady. Taste again; acidity can also be part of the coffee’s character.
Dry and flowing slowly
Try a little coarser. Check the dose fits the basket and that the machine is at its normal brewing temperature.
Spraying or uneven flow
Check distribution and level tamping for possible channeling before chasing the timer with grind changes.

These are possible starting adjustments. Change one variable at a time and let taste guide you.
Ready to brew?

Explore our coffees and find your next favourite.

Find your next coffee
About these recipes & further reading

These are Crosswind starting recipes. Pour-over and drip use the classic 1:16 coffee-to-water ratio. Espresso uses a 1:2 dose-to-beverage ratio. Adjust for your equipment, coffee and taste; manufacturer recipes may use different ratios.

Grind photographs illustrate relative texture; they are not a calibrated scale. Brewing photographs are illustrative.